# initialize shared variable for bias (1D tensor) with random values # IMPORTANT: biases are usually initialized to zero. However in this # particular application, we simply apply the convolutional layer to # an image without learning the parameters. We therefore initialize # them to random values to "simulate" learning. b_shp = (2,) b = theano.shared(numpy.asarray( rng.uniform(low=-.5, high=.5, size=b_shp), dtype=input.dtype), name ='b')
# build symbolic expression that computes the convolution of input with filters in w conv_out = conv2d(input, W)
# build symbolic expression to add bias and apply activation function, i.e. produce neural net layer output output = T.nnet.sigmoid(conv_out + b.dimshuffle('x', 0, 'x', 'x'))
# create theano function to compute filtered images f = theano.function([input], output)
import numpy import pylab from PIL import Image
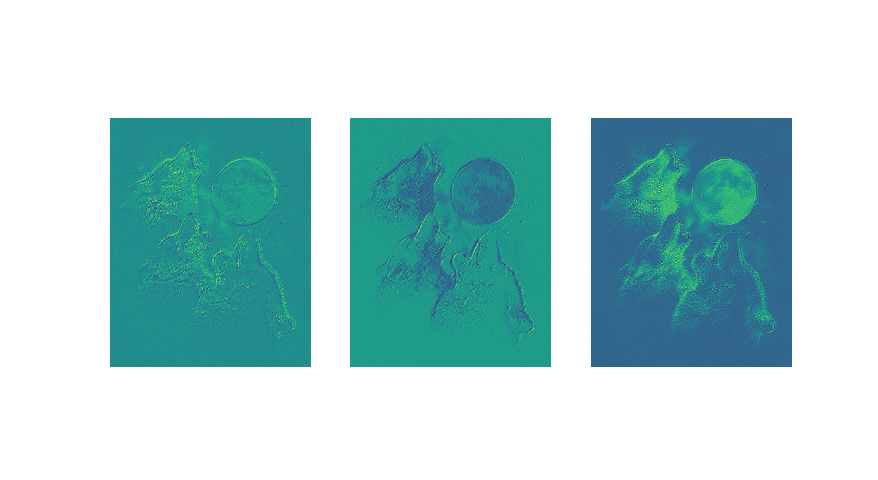
# open random image of dimensions 639x516 ''' 这里要加'rb',不然报Unicode错,字符不能以utf-8编码,16,32都不行 ''' img = Image.open(open('doc/images/3wolfmoon.jpg', 'rb')) # dimensions are (height, width, channel) img = numpy.asarray(img, dtype='float64') / 256.
# put image in 4D tensor of shape (1, 3, height, width) ''' 这里img.shape = (639, 516, 3) img.transpose(2, 0, 1).shape = (3, 639, 516) img_.shape = (1, 3, 639, 516) reshape将数组变成 0:1 0:3 0:639 0:516 这个样子 初步估计,首先3是图像的RGB,后面的是尺寸。为方便处理,转换成3在前面。 然后由于input定义为4D的所以要做这个处理。对input的4D分别是: > mini-batch size, number of input feature maps, image height, image width ''' img_ = img.transpose(2, 0, 1).reshape(1, 3, 639, 516) filtered_img = f(img_) ''' filtered_img.shape(1, 2, 631,508) 不理解为何处理后变为2 更新:是由W,b的shape决定的,当改为3,输出也是3 改为3后如图三所示 ''' # plot original image and first and second components of output pylab.subplot(1, 3, 1); pylab.axis('off'); pylab.imshow(img) ''' 这句的作用是将处理后的结果以灰图显示,若不加如图二 ''' pylab.gray(); # recall that the convOp output (filtered image) is actually a "minibatch", # of size 1 here, so we take index 0 in the first dimension: pylab.subplot(1, 3, 2); pylab.axis('off'); pylab.imshow(filtered_img[0, 0, :, :]) pylab.subplot(1, 3, 3); pylab.axis('off'); pylab.imshow(filtered_img[0, 1, :, :]) pylab.show()